Making an ice shanty is one way to take your ice fishing season to the next level by creating a secure, warm location to fish from that is better than temporary ice tents. However, this comes at potentially higher costs and a less transportable ice fishing option.
Making an ice shanty is easy with some basic tools and a bit of handiwork. Using a simple frame and waterproof materials for the walls and ceiling, you can build a simple ice shelter to get you on the ice as a weekend project. Using recycled materials and some creativity can help with the budget.
Keep reading for ideas on building an ice shelter that’s just right for you.
Basics In Designing An Ice Shanty
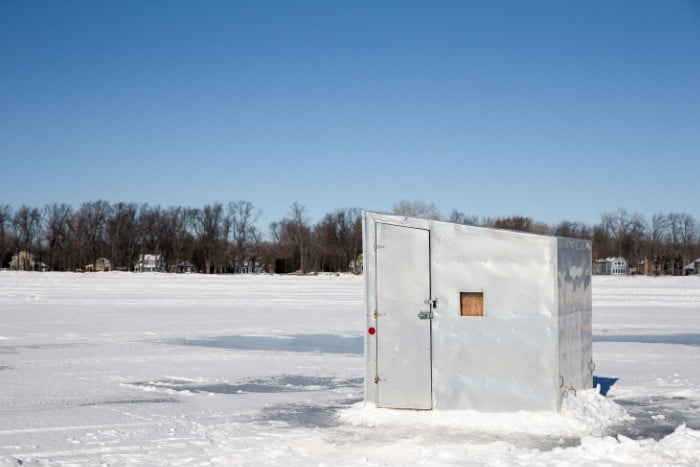
Ice shanties, ice houses, fishing huts, or whatever you want to call them are simple and lightweight shelters that can be placed on the ice to create a safe place from the elements.
Compared to pop-up tents and flip-over ice shelters, an ice shanty is much harder to transport but instead offers the best protection and will hold up in harsher conditions.
For anglers planning on fishing in one lake and can leave their ice house in one place for long periods, an ice shanty is the best option.
1. What Is An Ice Ice Shanty Used For?
An ice fishing shanty is used as shelter from the elements for a comfortable ice fishing trip and can be used to stay out on the ice for more than one day at a time.
Ice shanties can also be packed with more amenities than any other option, resulting in an ideal winter getaway.
The first ice fishing shelters were the result of anglers looking to extend their fishing season into the depths of winter.
These shelters were often built similar to outhouses, as simple shelters to store gear and snacks.
Compared to tents, the rigid wooden walls of ice shanties provide superior insulation and protection from the wind and can endure even the worst winter conditions.
The wind can become a real problem out on lakes, and hard walls can make all the difference.
2. What Are The Components Of An Ice Shanty?
The most basic components of an ice shanty are four walls, a door, a ceiling with somewhere to sit, and a hole in the ice.
Installing a floor will provide a layer of insulation from the cold ice, increasing the shelter’s durability.
Optional components of an ice shanty include windows, rod holders, and even bed platforms for extending a trip to several days.
When planning your build, you’ll want to consider how you plan to use it, including storage and any amenities you’ll need to build into the shelter.
Building a solid frame and choosing waterproof materials will significantly extend the life of your shelter, and it will last you decades with proper planning and maintenance.
3. Optional Additions To Your Ice Shanty
In addition to the components that make up the shelter itself, you may want to consider optional extras for the inside of your shanty and plan for them early.
For example, if you plan to use a heater, you’ll want to ensure sufficient ventilation for your chosen method.
If you plan on building a bed platform in your shanty, plan to put it on hinges to flip up during the day and give you more room.
Or, if you plan on having guests, you’ll want to install multiple holes in the floor to fish from and additional holes if you plan on using gear like an ice fishing flasher.
Simple electrical components, including lights and a charging station for your phone, should also be considered to ensure that you have the appropriate space for those things.
However, an external power source and USB lights would be easy to tack on at the end, or use lanterns instead, depending on your preference.
4. To Insulate Or Not To Insulate
The wooden walls alone will provide some protection from wind and insulation, but spray foam or insulation boards will create a much warmer shelter.
Insulation boards are the easiest option to work with, combined with spray foam to fill in the cracks; you can create a warm shelter without adding much extra weight.
The more time you spend in your shelter and the colder your environment, the more likely it’ll be worth adding insulation.
Adding insulation may also eliminate the need for a portable heater, trapping enough of your body heat to be a bearable temperature for long periods of use.
With both insulation and a propane heater, you’ll be able to save fuel and stay very warm.
5. Plan The Right Size For Your Use
The larger you plan your ice shanty, the more space you’ll have, with the negatives of having extra weight, greater material costs, and difficulty in moving it.
The height of the shelter is also up to personal preference. Common dimensions use 4×8 sheets of plywood for the floor and walls, sloping in height from four feet to about five and a half feet.
This method results in the minimal cutting of your materials and provides a sloped roof of 27 degrees, perfect for keeping the snow off and providing enough headroom for sitting.
If you want to be able to stand in your ice shanty, then you’ll need to make sure to plan that accordingly.
Using 4×8 sheets of plywood would be an easy modification but would add weight and costs to your project.
6. Choose A Transportation Method
Before you start putting your ice shanty together, you’ll want to plan how to get it from your home to the lake. The closer you live, the easier this is, but you’ll still need the right equipment.
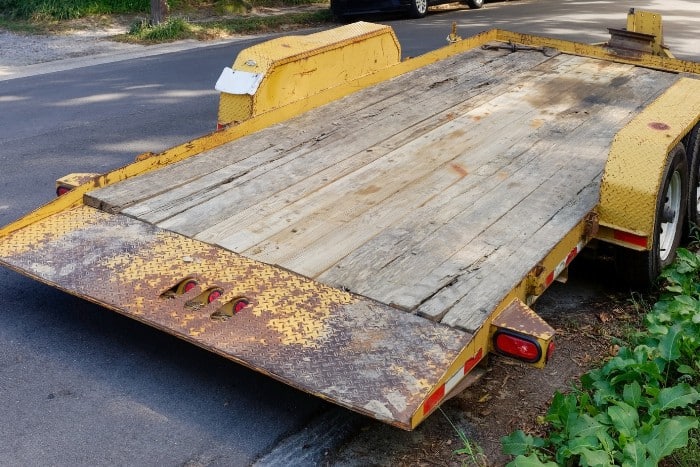
A flatbed trailer is perfect for moving an ice shanty, along with a few friends to help you lift it and get it secured to the trailer.
You’ll want to be sure that the ice is at least 12-15 inches thick and can support a heavy load such as a medium truck.
Some ice shanties are built on top of a trailer for even easier transportation. This method is expensive but makes moving it from one area to another a breeze.
Cargo trailers are also a common option to retrofit into a portable ice house and are an expensive but functional DIY option.
Small ice shanties can also be put on sleds and pulled with an ATV or other vehicle, depending on your use.
7. How To Save Money While Building
If you want to stick to a budget, there are a few ways to keep costs down. The first is using materials you already have on hand or from friends and family who have unused lumber.
Check local markets for good deals on building materials, which can save you a good chunk of money if you have some patience to plan out your build.
You also might be able to come across a partially finished project shanty, saving you both time and money that you can put into other improvements.
How To Build An Ice Shanty?
Now that you’ve got an idea of what you can use an ice fishing shanty for and you’ve put some thought into the layout and components, be sure to plan out your design on paper.
Don’t be afraid to go through several iterations to find a design that will meet your needs best.
Depending on the tools and how handy you are, building an ice shanty can be knocked out in an afternoon, or you may need to spend a couple of days getting everything just right.
Either way, building an ice shanty is a rewarding experience and can result in a piece of functional work that you can be proud you made on your own.
1. Materials Needed
The materials listed are for a simple shelter, using the bare minimum materials to create a solid structure.
Depending on your layout, you may need different quantities of lumber or extra hardware for folding frames, doors, or other amenities.
Lumber
- 25 x (2”x4”x8’) framing lumber (waterproof works best)
- 1 x (3/4″x4’x8’) plywood for flooring (can be thicker)
- 6 x (1/8″x4’x8’) utility sheets for walls and roof
Other Materials
- Wood glue
- #8 x 2 1/2″ screws for attaching plywood sheets
- #9 x 3 1/2″ screws for framing 2x4s
- Spray insulation to fill in any gaps
- 2 x hinges for creating a door
- Finishing nails (optional)
These materials are enough to build your ice fishing shanty, and depending on local costs, you might pick everything up for anywhere from $150-$400 or cheaper if you can find good deals that work for you.
2. Tools Needed
A saw, pencil, electric drill, and tape measure are all the tools you need to complete this project.
Depending on the available tools, you can complete this project quickly, or you might need a couple of days if you don’t have the best tools.
A circular saw is needed at the bare minimum to process the lumber and cut it to size; cutting the plywood will be easier and more precise with a table saw.
A table saw will also let you rip the 2x4s into 2x2s to frame the door and save weight, but this step is not required.
Always pay attention and wear safety glasses when operating power tools to prevent unwanted accidents. Ask for help if needed.

3. Start With The Base And Frame
You should frame the floor to be 4×8 feet, with floor joists placed every 24”. Cut five 2x4s into 45” long sections, and use your 3.5-inch screws to attach them to two 8’ long 2x4s on either end.
The 2x4s should be aligned with their short edge on the bottom, providing maximum compressive strength for the floor.
Also, the braces are cut to 45” long because 2×4 lumber actually measures 1.5”x3.5” rather than whole numbers.
At this time, if you plan on adding sled-style runners, add them to the bottom of the frame to help slide the shelter along the ice. While optional, this will help move your shelter around if needed.
Then, take your thick piece of plywood and screw it into the frame you’ve made for the floor. It should fit perfectly with no overhang. Combining wood glue and deck screws will keep the floor in place.
Once the floor is done, you can install the rest of the framing on the base. Five 52” long pieces of 2×4 can be screwed in flush to the bottom of the frame for the backside of your shanty.
If you want a flat roof, which is not recommended as you’ll have to clear snow off and you’ll lose headspace, you can use 52” long pieces for your whole frame.
For a slanted roof, you’ll want to cut two 76” long 2x4s for the front corners.
The tops of all the framing materials on the front and back should be cut at a 26.5-degree angle, allowing the roof frame to sit flush.
Attach an 8’ long 2×4 inside the front corner pieces, and screw five 56 3/4” 2x4s into the supports along the back and the front crosspiece.
Finally, measure out two 2x4s to go on the sides of the shelter for additional support in the middle of each side.
4. Add The Walls, Doors, and Windows (Optional)
Once you finish the frame, put the walls on the back and two sides of the ice shanty. The piece on the back should fit snugly, and the two wall pieces will need to be cut to match the angle.
Then, the roof can be screwed on. You’ll likely need to use some scrap pieces of the sheets used for the walls to fill in the empty spot the first sheet on the roof doesn’t cover.
Depending on your preference, one or two doors can be attached using hinges on the front. Using 2x2s is perfectly fine for framing out the door and adding stability, or you can use the leftover 2x4s.
At this time, you can also add the windows to the side walls, if any are desired
5. Use Spray Foam Insulation To Fill In Any Gaps
Any gaps between boards can be filled with spray foam to prevent drafts and create a watertight seat to prevent the snow from coming through the walls. For added longevity, you can paint the shanty as well.
Staining the wood would also help protect it from the elements and last multiple seasons. However, at this time, you’ll have a completed ice shanty that you can put out on the ice and get fishing!
6. Make It Your Own!
Of course, the method above is just one way to build an ice shanty and is a basic version of such a structure.
You’ll likely have many ideas for improvements, or you’ll choose to choose a completely different design that suits your needs better.
Seating, storage, and heating are all good additions that you might want to add.
Another good idea is to use hole covers designed for ice shelters that allow you to have a solid floor when you aren’t fishing and prevent you from accidentally stepping into the ice hole when you aren’t paying attention.
Load your shelter onto a trailer, drive out to your favorite frozen lake, and get to fishing!
Wrapping Up
In conclusion, creating an ice fishing shanty is a lot of work but rewarding. The more creative and handy you are, the more unique a build you can make for yourself and perfect it for your needs.
Make sure to look around to find materials at a reasonable cost, and you might get a good deal on insulation, lumber, or general amenities that you might want to add to your ice fishing shanty.