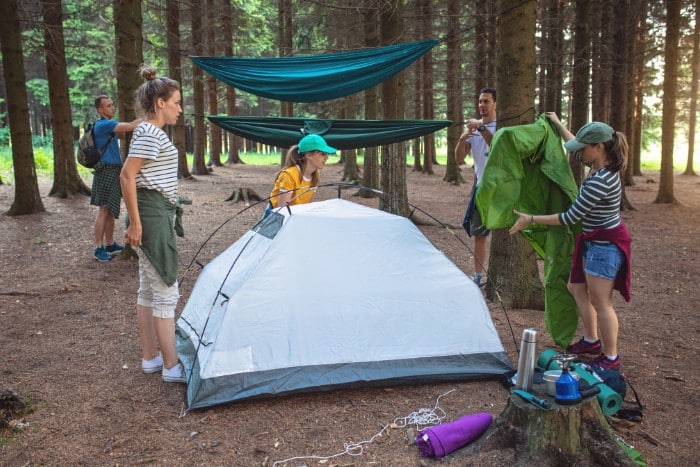
If you’re in the market for a portable ice fishing shelter, you’re probably aware of the two main styles: tents and flip-overs. While tents are often larger than flip-overs, the latter is easy to set up and transport, perfect for one or two anglers.
Choosing a flip-over shelter is more portable and more accessible to set up than other ice shelter options. Flip-over ice shelters come with their sleds and a cover that deploys in a few minutes by expanding the supports and pulling it over the built-in sled. The process can quickly be done alone.
If you recently purchased a flip-over or are considering getting one, keep reading to learn how easy it is to set one up.
The Basics Of Setting Up A Flip-Over Ice Shelter
The specifics of setting up a flip-over ice shelter will vary by brand and model, but the general setup will be the same across the board.
Be sure to consult the owner’s manual to set up the shelter and properly use it to avoid voiding the warranty.
1. Make Sure To Construct Your Shelter Properly Ahead Of Time
Before even taking your flip-over ice shelter out to go fishing, the first step is to take it out of the box and put all the pieces together.
The specifics will vary based on the particular model, but all of them will begin with a sled base with support poles attached that fold out and expand.
Assembling the product properly ahead of time means that setting it up will be easy, and you won’t need to fumble around with different pieces in the cold.
Your supports should be firmly in place but not so tight that you struggle to fold them.
This point is also the right time to ensure you have all the pieces you need rather than realizing you need to replace a beam later.
Set it up a few times at home before going out on the ice to ensure you are familiar with the setup process.
2. Transport The Shelter To Your Fishing Spot
The next step that is easy to overlook is transporting the shelter from your home to the body of water you’re fishing.
One of the disadvantages of a flip-over ice shelter is it does not pack down small, so you’ll need either a truck or a large hatchback to fit the shelter.
Since the sled is built in, once you get to the area you’re going to be fishing in, you can pile your gear on and either hand pull the sled or attach it to an ATV or other vehicle.
Slide the shelter to a good fishing spot, and you’re good to go.
3. Drill Your Hole In The Ice
If the weather is particularly windy or cold, you could wait to drill your hole in the ice until the shelter is set up, but it’s easier to do before setting up since you have extra space.
Also, if using a gas-powered auger, it’s much safer to do so in the open air.
It is easy to drill your hole ahead of time since flip-overs are easy to move, so once you have selected a spot and drilled the hole, you can move the sled to the right place.
4. Adjust Your Flip-Over Shelter To Be The Right Distance For You
Now that your hole is in a good spot, you can adjust the shelter to be a comfortable distance from the ice fishing hole.
Depending on the length of your ice fishing pole, you might find a comfortable distance between 2-5 feet away.
Remember you want to find a distance where you can comfortably hold your fishing pole and use it for jigging, and you want the tip of your rod to be directly over the hole, which will reduce the risk of your line scraping against the ice and breaking off.
Some flip-overs have built-in seats that slide back and forth, while others are stationary.
Setting the distance is less critical if you can adjust your chair on the fly, while you’ll want to ensure you are comfortable with stationary chairs.
5. Expand The Supports And Put Them In Place
Now that you have everything right, you can set up the shelter. As the name implies, most supports will “flip over” the built-in sled 180 degrees, creating an enclosed shelter.
The supports attached to the sled are on hinges that allow them to move quickly to the right spot. Fully expand the main frame poles and pull them into place.
Additional supports are likely to be installed between the main frame sections for added structure and stability. These poles will keep everything in place and support the cover once you put it in place.
Everything should slide out and securely click in place, and the frame should be very sturdy once set up.
Ensure that everything is set up according to manufacturer instructions to prevent any damage from misuse of the product.
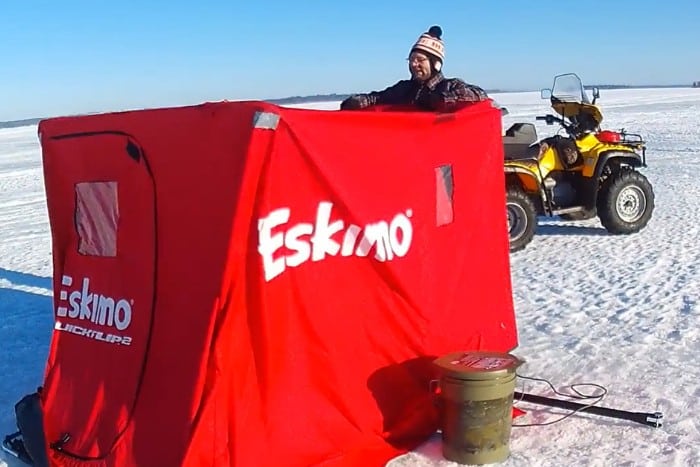
6. Fasten The Cover To The Poles
Once the frame is in place, you can pull the cover over and attach it with any snaps or velcro loops supplied with the cover. Everything should be secured tight to prevent any movement.
This step is easier to do with two people, especially in high winds. However, if you are a solo angler, you can still manage to work the cover on and get it secured in place.
Some models will let you partially collapse the structure of the frame, making it easier to slip the outer layer on and secure it before expanding the frame to create a taught fit with the tent portion.
7. Anchor Down Your Shelter (If Needed)
You might need to anchor down your shelter if you plan on staying in one location for a long time, or possibly overnight, and don’t want your shelter blown away.
If the weather is calm or you plan on moving often, you can forgo this step, but it is necessary in windy conditions.
In mild conditions, packing the available snow around your shelter can seal gaps and provide enough anchoring in light wind. In more extreme situations, better anchoring systems may be necessary.
The best way to anchor down your ice fishing shelter is by using eye bolts designed to be drilled into the ice and ropes attached to your shelter and tightly attached to those eye bolts.
This method will keep your shelter in place even in the windiest conditions, so you don’t need to worry about it going anywhere.
Many people choose not to anchor down their shelter if they don’t need to since one of the perks of a flip-over is it is easy to pull from one spot to the next.
If you aren’t having luck with one hole, you can quickly move to the next.
8. Finish Your Personal Touches And Start Fishing!
The last step is to set up any additional equipment you may have and get to fishing! At this point, you can set up heaters, flashers, and anything else you may have brought.
Ice fishing is much more enjoyable when you are comfortable, so using whatever equipment helps you have a better experience is good.
A heater can significantly upgrade your trip so that you’re ice fishing in comfort.
Wrapping Up!
This article helped you understand what goes into setting up a flip-over ice fishing shelter! The specifics vary based on the shelter, but for the most part, the steps will be the same as above.
Choosing the right spot will improve your trip, so don’t be afraid to move frequently if you aren’t catching anything.
With a flip-over shelter, it’s easy to move from one place to another, helping you pick the right spot!
Choosing a flip-over shelter means you cut down on setup time and can spend more time with your line in the water!