Few pieces of equipment have made ice fishing more enjoyable and accessible than ice fishing flashers. They help ice anglers to spend less time searching for the perfect fishing spot and more time with a line in the water.
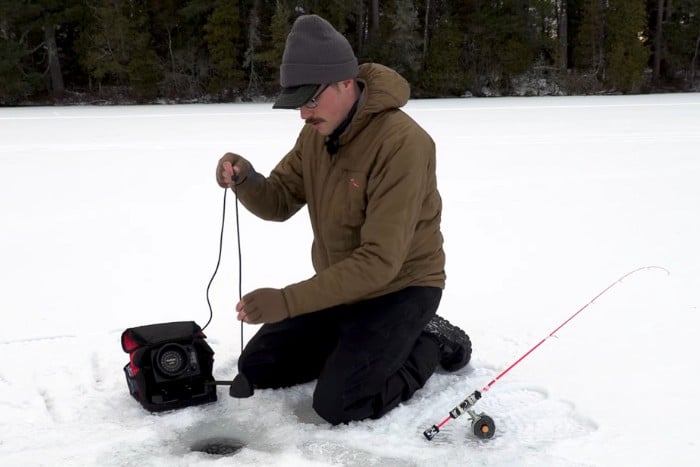
Ice fishing flashers are battery-operated portable sonars that are able to detect fish, your bait, and water depth. The attached transducer is placed in the drilled hole below the ice line. Then, any fish in the area appear as colorful dashes on the circular screen.
The flashers aren’t overly complicated to operate, and with knowledge of a few key features, you’ll be able to enjoy all of the best aspects of ice fishing.
Understanding How Ice Fishing Flashers Work
Ice fishing flashers aren’t as detailed or advanced as other fish finders.
However, as long as you have all of the parts in working condition and understand the few buttons, you’ll be able to dial in your setup and get an excellent reading of the action under the water’s surface.
1. The Transducer
The first thing to understand about your ice fishing flasher is the transducer. The transducer is the most essential part of the entire setup.
The transducer is the part with a long rubber cord and a hard rubber ball at the end. Make sure the end of the transducer is about a foot below the bottom of the ice.
If you barely put it in the hole, it’ll bounce off the ice and give you false readings. Have it sit below the ice line, and it will be able to detect your depth, bait, and fish.
2. Batteries
You’ll also want to make sure your flasher has a power source. Each flasher has a set of battery terminals like a car. Hook the positive lead to the positive sign on the battery and the negative to the negative.
While lead-acid batteries have been the dominating battery type for years, the creation of the lithium-ion battery has changed the entire industry.
These batteries are only a pound and are incredibly compact. Light batteries make hole hopping even easier! Fully charge your lithium-ion, and you’ll be good to go for hours.
At the beginning of the ice fishing season, one full charge will last you for around a dozen trips. A 12V 7AH – 9AH lithium-ion battery is what you’re going to need.
These batteries are not overly expensive, and they’ll give you peace of mind that you can fish even longer without a full charge. It’s not a bad idea to travel with a spare battery if you get the chance.
3. Flashes
The most important thing to understand is what the flashes on the fiber optic display mean. They can be a bit confusing, but they’ll make sense quickly when you learn the terminology.
a. Range
You can turn on your flasher by twisting the range knob. You’ll see red and green bars on the screen’s left side when you do.
These bars indicate the bottom. You can adjust the range knob to make the bottom appear larger or smaller depending on the depth you’re fishing.
Unless you’re fishing very deep, the 20-foot range works well.
b. Gain
The gain is what allows you to identify fish and your bait quickly. You can adjust this knob until you can see your lure moving and any fish that are sitting in your general vicinity.
You want to turn down the gain if you’re using a large lure for large fish. Do the opposite if you’re using a smaller lure for smaller fish.
The gain features take some getting used to, but it’s one of the most helpful features on an ice fishing flasher.
You want to be comfortable with what you’re seeing and allow yourself to see far above and below your bait for any fish that may be cruising along.
c. Zoom Feature
The left side of the screen will likely have a zoom feature that allows you to monitor the bottom five feet of the water column.
The zoom feature gives you a more detailed view of what’s happening and the action that may be occurring.
d. Interference Reducer
The interference reducer is another button that helps you avoid any unnecessary flashes from any other fish finders that might be close to you.
If you’re fishing with someone else who has a fish finder, do your best to give yourself two feet of space to avoid any interference.
When you’re setting up your ice house, and you’re planning on fishing with one or two other people with fish finders, you’re going to run into heavy interference.
Do your best to set up diagonally from one another because this will give you the lowest amount of interference.
4. Depth
The depth changer on ice fishing flashers is a feature that many anglers forget to adjust and lose out on quite a few fish as a result.
The depth changer is usually a knob that’s located near the gain and zoom knobs. The depth knob is generally in increments of 20, so if the water is less than 20 feet deep, you can keep it on the first setting.
As the water you’re fishing gets deeper, make sure you adjust the knob accordingly. Some ice fishing flashers aren’t able to detect depth, so you have to do some experimenting.
You want to ensure the bottom takes up a small portion of the screen and any fish between the bottom and the transducer are easily visible.
If your depth is too shallow, you’ll notice lines completely fill the screen, and you aren’t able to tell the bottom, your bait, or any fish apart.
If your depth knob is set too deep, you will barely be able to make out your bait or any fish. A couple of twists of the knob will get you in the proper setting.
How to Best Use Ice Fishing Flashers?
With an understanding of a fish finder’s different buttons and features, it’s crucial to understand how to use them to your advantage for the best results.
While it may seem as if they’re a bit limited in what they can do, they make a huge difference!
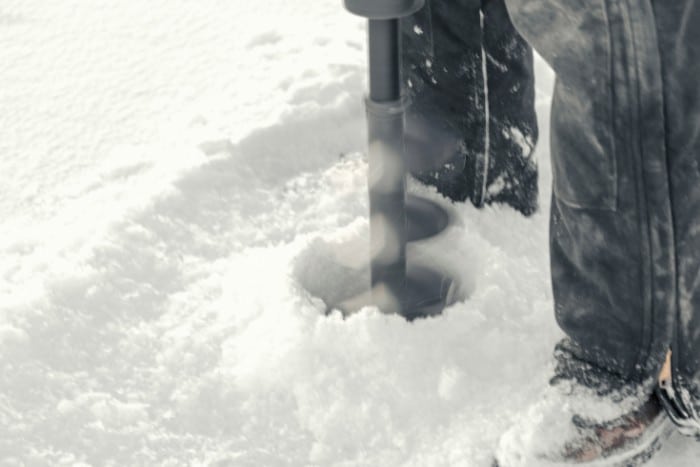
1. Drill a Separate Hole
The most helpful thing you can do when you’re using a fish finder is to drill a separate hole for it. If possible, you want one hole for your line and one for your transducer.
At the same time, some tiny ice houses may not allow this due to a lack of room, but most will. Put the hole right next to the one you’re going to use for fishing and place the transducer.
The extra hole will prevent you from getting your line tangled on your transducer. Too often, anglers lose fish because they bring them close to their hole and have forgotten to take the transducer out.
There’s no worse feeling than losing your fish and getting tangled. Prevent this by drilling a separate hole. You’ll still get the same readings if it were in the hole you’re fishing.
The hole doesn’t need to be more than 1 to 2 feet away from where you’re sitting. You’ll find yourself interfering with other fish finders in the shelter if it’s any further.
2. Read the Bottom
The first thing you can do when learning how to use the fish finder is to read the bottom. A rock-filled and hard bottom is going to be a dark red line.
The hard bottom is a great place to be if you’re fishing for bass. If it’s a muddy bottom, the lines will appear green and yellow, meaning there’s not as strong of a signal.
These muddy bottoms will hold walleyes and panfish.
The kind of bottom you need is important, depending on the type of fish you’re targeting. Keep red and green colors in mind for the kinds of fish you’re targeting.
Reading the bottom is especially important if you’re ice fishing on rivers.
Fish living in rivers are extra particular about where they choose to live, so identifying what’s below the surface will let you know if you’re in the right spot.
3. Identify Fish
When first dropping your transducer into the hole, you want to see if you mark fish.
When you have the bottom identified and the gain and range set, you want to know if you’re able to see small red/yellow dashes suspended above the bottom. These smaller marks indicate fish.
The fish can appear right near the bottom all the way up to below the surface, depending on their behavior and activity. The fish are likely not swimming up and down when you mark them.
They’re likely suspended in place, and as soon as you drop your bait in the water, they’ll begin the move.
If you see fish moving up and down the water column when you drop your transducer in the hole, you can safely assume they’re in a feeding mode.
Fish under the ice are rarely active because of the extreme winter conditions, so any activity is good. Take advantage of it.
Plus, many panfish will move grouped up in schools throughout the winter. So, numerous marked fish means that there is a school in the area.
These schools don’t last forever, so the quicker you get your bait in the water, the faster you’ll land fish.
If you see a large, thick line on your fish finder, it doesn’t always mean that it’s a large fish. Odds are, it’s a significant line because the fish is close to your transducer.
Any fish that’s alone or swimming up near the surface is likely larger, so do your best to get your bait as close as you can to it.
4. Locate Your Bait
The next thing you want to do when you turn on your flasher is to locate your bait. Now that you’ve found fish, you want to see how they react to your lure or bait.
As soon as you see your bait falling in the water column, it’ll give you an idea of its visibility. You may have to adjust the gain if it’s showing up too large or too small.
If you start seeing those red/yellow lines moving toward your bait, chances are you’re in action. You always want to keep an eye on your bait when you’re ice fishing.
Since you have no idea what’s happening below the surface, sitting blind and wondering if there are any fish near you, it can quickly become a very dull day on the water.
Keep your bait within the sonar range of the transducer, and you’ll be able to track anything that comes near it.
5. Setting the Hook and Landing Fish
Using a fish flasher essentially allows you to predict when you will get a strike. You’ll see your bait and see the fish moving towards it. As soon as the line of the fish overlaps with the line of your bait, get ready.
Watch your rod tip, and as soon as you see it dip hard, be prepared to set the hook and land the fish. Sometimes, this can happen so quickly that you’re not always prepared.
It’s best to always pay close attention to your rod tip. If you’re lying your bait on the bottom or right near it, you may not see any fish move toward it.
Many anglers lose fish because they pay more attention to their ice fishing flasher than their rod tip.
If the fish is over top of your bait, but you haven’t detected a strike, feel free to reel in a few inches or continue jigging your bait.
The jigging will entice the fish a bit more and give them a chance to chase your bait.

6. Be Portable
The beauty of ice fishing flashers is that they allow anglers to be as portable as they need. As you prepare to set up your gear for the day, don’t be afraid to drill multiple holes in an area to find the right spot.
As soon as you pop through the ice, drop in your ice fishing flasher and get a quick reading.
The transducer will give you the type of bottom you’re fishing and the depth, and it will mark any fish that are in the area. If there’s nothing nearby, go ahead and repeat the process.
Even if you aren’t marking fish, that doesn’t mean you’re not fishing in a good spot. The type of bottom and the water depth is vital.
For example, panfish will sit in 10-15 feet of water with a rocky/muddy bottom filled with plants. You can safely assume that panfish will travel through here, so don’t hesitate to set up here and wait.
Your flasher will essentially tell you all of this information.
Final Thoughts
Ice fishing flashers have become a helpful tool for ice anglers of all skill levels. They make life far easier if you’re new to the sport or visiting a new lake.
Make sure you have a strong understanding of the buttons and their operations before you visit the water, and you’ll be in great shape.
Take a look around for a flasher in your price range, and make the purchase before the next ice season!